

Social media content calendar: a free template for Google Sheets and Excel
A free social media content calendar template (CSV) for Google Sheets or Excel, how to fill a week, and how each row becomes a scheduled post.
7 minute read By SocialHelper team

A social media content calendar is a plan of what you’ll post, where and when, with one row per post. Download the free template below as a CSV file and import it into Google Sheets (File, then Import) or open it in Excel. Fill in a week at a time, and each row becomes one scheduled post, in the platform’s own scheduler or in a tool like SocialHelper.
The free templates that rank for this search are mostly Google Drive files you have to copy into your own account, sign-up forms or pictures of a spreadsheet. This one is a plain CSV file that opens in any spreadsheet app, with a filled example week to copy from.
Download the free content calendar template
Download the social media content calendar template (CSV). It has a header row, five example posts for the week of November 9, 2026, and ten empty rows. The examples show a small bakery’s week; delete them once you’ve seen how they work.
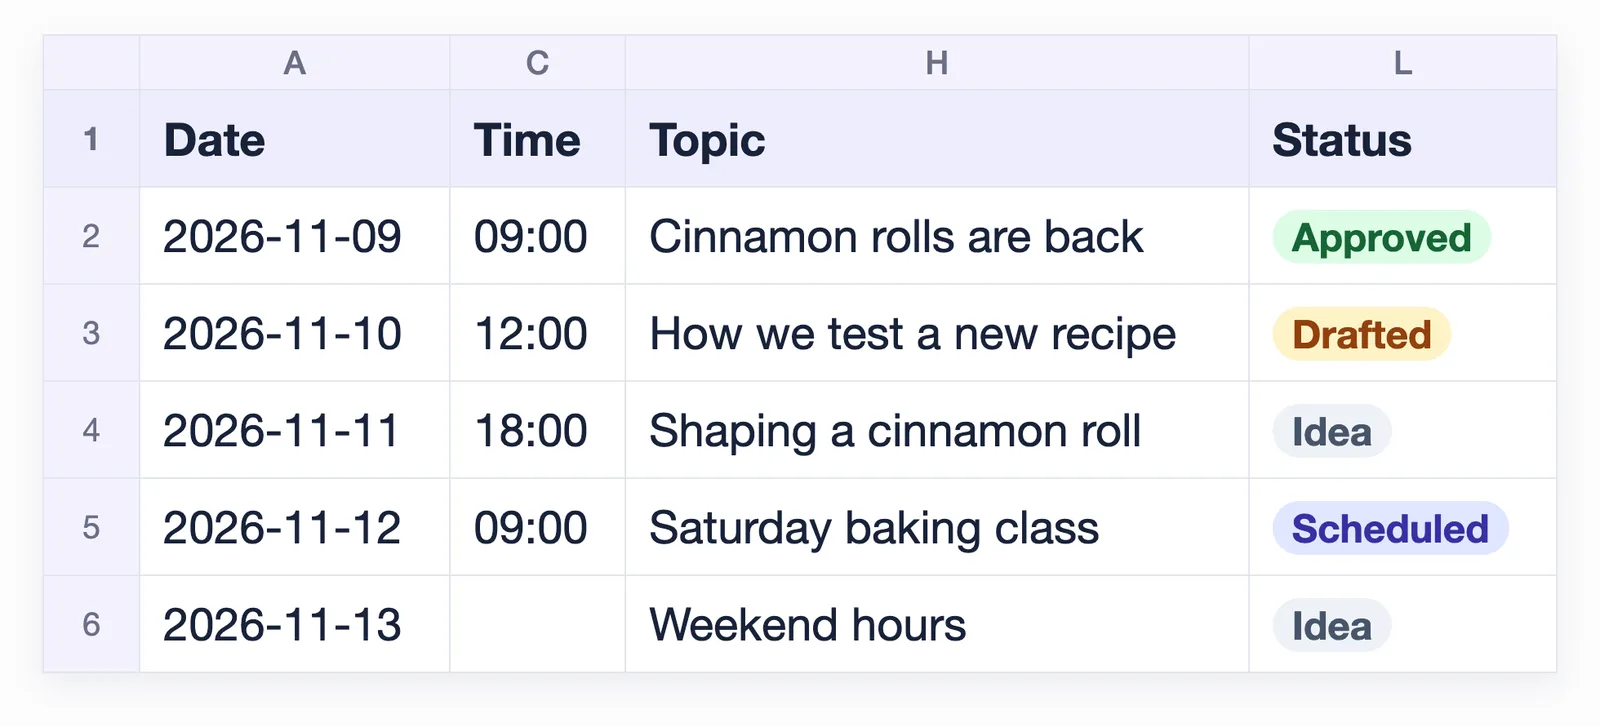
| Column | What goes in it |
|---|---|
| Date | The day the post goes out, written as 2026-11-09 so every app reads it the same way |
| Day | Mon to Sun, to read the week at a glance |
| Time | 24-hour time, such as 09:00. Leave it empty to use your posting times |
| Time zone | The zone the time is in, such as America/Toronto |
| Platforms | Where the post goes, separated by commas |
| Format | Photo, carousel, short video, text or link |
| Content pillar | The theme the post belongs to |
| Topic | A few words to recognize the post |
| Caption | The text of the post |
| Link | A URL, if the post has one |
| Media | The file name of the photo or video, or a link to it |
| Status | Idea, Drafted, Approved, Scheduled or Published |
| Owner | Who writes or approves it |
| Notes | Anything else, such as a shorter version for one platform |
A content pillar is a recurring theme you post about, such as your product, how-to tips or your community. Rotating three or four pillars through the week keeps the feed varied without a new idea every morning.
How to import the template into Google Sheets
Google Sheets imports CSV files directly. You can bring the template in as a new spreadsheet or as an extra sheet in one you already use (Google Docs Editors Help: Import data sets and spreadsheets).
- Download the template and open Google Sheets on your computer.
- Open a spreadsheet, or create a blank one.
- At the top, click File, then Import, and choose the CSV file you downloaded.
- Pick an import option, such as Create new spreadsheet or Insert new sheets.
- Leave the separator on Detect automatically, then click Import.
Then turn the Status column into a dropdown, so every row uses the same five words. Select the Status cells, click Insert, then Dropdown, and add Idea, Drafted, Approved, Scheduled and Published as the options. Google Sheets rejects anything else typed into those cells unless you choose Show a warning under Advanced options (Google Docs Editors Help: Create an in-cell dropdown list).
How to open the template in Excel
Excel opens a CSV file like a workbook. Click File, then Open, and choose the file, and Excel shows the data in a new workbook. To add the calendar to a workbook you already have, open the Data tab and click From Text/CSV. Then choose the file and click Import (Microsoft Support: Import or export text or CSV files).
Excel reads the dates with your default date settings, so 2026-11-09 may appear in your local format. Opening a CSV file doesn’t change its format either, so save it as an Excel workbook before you add colours or dropdowns, or they’ll be lost.
How to fill a week
Fill the calendar a week at a time, in this order.
- Pick your posting times. Use the hours your followers are online, from each platform’s analytics. Our guides to the best time to post on Instagram, Facebook and LinkedIn show where to find them.
- Give each day a pillar. Product on Monday and a how-to on Wednesday, for example, so the week isn’t five sales posts.
- Write each caption for the strictest platform in the row. X allows 280 characters, Instagram 2,200 and LinkedIn 3,000, so a caption that fits X fits the other two. Put a longer version for one platform in Notes. The character limits guide covers every platform.
- Add the media. Name the file in Media, and check that its size and length suit every platform in the row.
- Move each row through Status. A row starts as an Idea and becomes Drafted, then Approved once someone has checked it. It’s Scheduled once it’s in a scheduler, and Published when it’s live.
Keep the time zone column filled in even if your whole team sits in one city. Facebook says that “all times for scheduling correspond to your current time zone,” and LinkedIn converts scheduled times to UTC from your device’s time zone. A row without a zone is easy to schedule an hour off after a trip or a daylight saving change.
How far ahead you can schedule each platform
A calendar can run months ahead, but each platform’s own scheduler only accepts posts within a window. Rows past that window wait in the sheet until their date comes into range.
| Where you schedule | How far ahead |
|---|---|
| Facebook Page, in Meta Business Suite | 20 minutes to 29 days |
| Instagram app | Up to 30 days, 25 posts a day |
| LinkedIn profile | 10 minutes to 3 months |
| LinkedIn Page | 1 hour to 3 months |
| SocialHelper | Up to 1 year |
Facebook’s window comes from its help page on Page posts (Facebook Help Center: Schedule a post for your Page). Instagram’s comes from its page on scheduled content (Instagram Help Center: Scheduled posts and reels). LinkedIn gives profiles 10 minutes to 3 months (LinkedIn Help: Schedule posts), and Pages 1 hour to 3 months (LinkedIn Help: Schedule a LinkedIn Page post). SocialHelper’s limit comes from its own code. The guides to scheduling Facebook posts and scheduling Instagram posts walk through each platform’s steps.
Turn calendar rows into scheduled posts
SocialHelper doesn’t import spreadsheets, so you copy each row in by hand or through an assistant. The columns match what the composer asks for: Platforms becomes the accounts you pick, Caption the text, Media the attachment, and Date, Time and Time zone the moment it goes out.
- A row with a time: Write the post in the composer, pick the accounts, then choose Schedule and the date and time.
- A row without a time: Choose Add to queue, and the post takes your next free posting time. Posting times are the weekly slots your team sets once, up to 70 a week, in your chosen time zone.
- A batch of videos or photos: Bulk schedule turns up to 20 files into separate posts, each with its own caption. It then queues them or spreads them out over hours, days or weeks.
- A whole week at once: Paste the rows into an AI assistant connected to SocialHelper and ask it to schedule them. It checks each post against every platform first.
Once the posts are scheduled, SocialHelper’s Calendar shows the week by day, whoever made them. Drag a post to another day and it keeps its time of day, as the calendar help page shows. The weekly plan with AI walks through the assistant route from briefing to a full queue.
If you only post to Facebook and Instagram, Meta Business Suite has a calendar too. Its Planner shows your Page’s and Instagram account’s posts, stories, reels and ads by week or month. Meta says it “can help you plan and manage your marketing calendar” (Meta Business Help Center: Use Planner in Meta Business Suite).
Frequently asked questions
Is there a free social media content calendar template?
Yes, the template on this page is a free CSV file with 14 columns and an example week. You don’t need to sign up or copy anything into a Google account to use it.
How do I make a social media calendar in Google Sheets?
Import a template rather than starting from a blank grid. Download the CSV file above, click File, then Import in Google Sheets, choose the file and click Import. Then turn the Status column into a dropdown.
What should a social media content calendar include?
At minimum, the date, time and time zone, the platforms, the format, the caption, the media and a status. A content pillar, an owner and a notes column help once more than one person writes posts.
How far ahead should you plan social media content?
Plan at least a week at a time, so you can write and approve posts in one sitting. Schedule them within each platform’s window: 29 days on Facebook, 30 on Instagram and 3 months on LinkedIn, or up to 1 year in SocialHelper.
What’s the difference between a content calendar and a scheduler?
A content calendar is the plan, and a scheduler is the tool that publishes each post at its time. You plan in the spreadsheet, then copy each approved row into the scheduler, and the template’s columns match what a scheduler asks for.
How we checked this
We read Google’s and Microsoft’s help pages on importing CSV files and Google’s page on dropdowns on October 17, 2026. The same day we read the scheduling help pages of Facebook, Instagram, LinkedIn and Meta Business Suite. We then ran a fact check of every step and limit against them. We tested the template file on October 17, 2026 with Python’s csv module: 16 rows of 14 columns, plain ASCII text, served as text/csv.
If a step has changed or the file doesn’t open for you, contact us and we’ll fix it.


